Hey there! If you’ve ever scrolled through a screen or a TikTok haul and thought, “Wait, that sublimation patch I saw? Could I make something even cooler—like my own?” I get it. As someone who’s been in the sublimation patches game for years (full disclosure: I run a little supplier that works with hobbyists, small businesses, and everyone in between), I hear this question at least once a day: “Can I design my own sublimation patches?” Sublimation Patches

Short answer? Hell yes. But it’s not just grabbing a transfer sheet and hitting print—there’s a science to this stuff, and I’ve seen way too many people waste time and money skipping the basics to get a patch that fades, peels, or looks nothing like their design. Let’s break this down like we’re chatting over a coffee (or energy drink, no judgment—sourcing materials is chaotic), no stuffy jargon, just real talk from someone who’s messed up enough to know what works.
First, let’s get one thing straight: sublimation patches aren’t iron-on vinyl. If you’ve ever used HTV (heat transfer vinyl) that peels after three washes, that’s a whole different beast. Sublimation works by turning dye into a gas that bonds with the polyester fibers in the patch base—permanently, not just sitting on top. That means your design won’t crack or peel (if you do it right) and it’ll be super vibrant, way more than screen printing for small runs. But that also means the patch base matters. You can’t sublimate on cotton, right? Cotton doesn’t have the polyester fibers to hold the dye. So if you’re designing a patch to put on a cotton jacket, you’ll need a polyester patch base (most of the ones we sell are 100% polyester, or a poly-c blends with high polyester content) that can handle high heat and pressure.
Wait, before you start drafting your design—let’s talk specs. This is the part most new designers mess up, and it drives me a little nuts. Sublimation works best with high-resolution designs—300 DPI, minimum, because that’s how the tiny dye molecules get into the fibers. If your design is blurry on your phone screen, it’ll be way worse on a patch. Also, colors: sublimation uses RGB color mode, not CMYK. CMYK is for print on paper or fabric that sits on top, but RGB is the digital color space that matches what your sublimation printer uses. I’ve had a customer send a design in CMYK, print it, and wonder why the colors were all muted—turns out CMYK dulls bright reds and blues, which are the whole point of a cool patch.
Also, size and detail. If you want a tiny patch with a cartoon character’s tiny eye? Make sure that eye is at least 1/8 of an inch. Sublimation dye can’t make super tiny details pop on a small base—they’ll blur together. I’ve had someone try to do a patch with 1mm text and wonder why you can’t read it, oops. Another thing: no white in your design. Wait, what? Because the patch base is white (most are—we do black too, but that’s a different process), so any white in your design will just show through as the patch base color. If you want white in your patch, you need to leave that area blank on your transfer—no white ink, because sublimation doesn’t use white ink. That’s a big one, don’t skip that step.
Okay, so you’ve got your design sorted—RGB, 300 DPI, no tiny details, no white. Now, what equipment do you actually need? You don’t need a huge industrial setup if you’re just making patches for personal use or small orders. A decent sublimation printer (I recommend Epson EcoTank models—they’re affordable and easy to refill with sublimation ink, way better than those overpriced starter printers that clog), sublimation ink, heat-resistant transfer paper, and a heat press. A small 5×7 heat press works for patches, no need for a big one. Wait, but what if you don’t want to buy all that? That’s where us suppliers come in—we supply blank patches, transfer paper, even pre-printed transfers if you don’t want to deal with the printer mess.
Now, the actual process—this is the science part that makes or breaks the patch. Let’s say you’re using a white polyester patch, white transfer paper, and a heat press. First, you need to mirror your design! Sublimation is reversed when you print, so mirroring ensures it’s right-side up on the patch. That’s another mistake newbies make—their design is backwards, and they don’t notice until it’s too late. Next, pre-press the patch for 10-15 seconds at 380-400°F to get rid of any moisture or wrinkles. Moisture is the enemy here—it makes the dye not bond right. Then, place your transfer paper (design-side down) on the patch, tape it down with heat-resistant tape so it doesn’t move—this is key, if it shifts, your design is off.
Now, press time. 30-45 seconds at 380-400°F, with medium to firm pressure. Don’t press too light—no gaps, because the gas needs to get into the fibers. Too heavy, and you’ll warp the patch. When the time’s up, peel the transfer paper off hot—wait for it to cool, and the dye will set, so you’ll just get a blank paper. Peel hot, always. If you peel cold, you’ll leave some dye on the paper and your patch will be faded. I’ve tested this so many times—peeling hot is non-negotiable.
Wait, but what if you want custom shapes? Sublimation patches can be cut to any shape, right? Once the design is transferred, you can use scissors or a cutting machine (Cricut, Silhouette) to cut around the edge, or even get them cut with a laser. But if you’re doing irregular shapes, leave a little extra edge around the design when you press it—makes cutting easier. Also, if you’re putting a backing on them (like iron-on adhesive or Velcro), you can add that after sublimation.
Now, let’s talk about common mistakes I see every week, so you can avoid them. First, using the wrong pressure. Everyone thinks more pressure is better, but no—too much pressure flattens the polyester fibers, so the dye can’t bond. Second, not pre-pressing. I can’t tell you how many people skip pre-pressing and their patches have little spots where the dye didn’t take because of moisture. Third, using regular printer ink. Regular ink will wash right out, and it’ll damage your printer. Sublimation ink is designed to turn to gas at high heat, so don’t cut corners there. Fourth, washing wrong. Even if you do everything right, if you machine wash in hot water with bleach and dry on high heat, your patch will fade. We recommend washing inside out, cold water, hang dry or low heat—easy peasy.
But wait—what if you’re not a DIY type? I get it, not everyone has the time or space to set up a heat press and printer, especially if you’re ordering a larger batch for a business or an event. That’s where us suppliers come in. We can print your custom design onto sublimation transfers, press them onto blank patches, cut them to any shape, add backings (iron-on, Velcro, safety pins—whatever you need), and ship them right to your door. No stress, no messing up your own printer. I’ve worked with small boutique owners who want patches for their clothing lines, nonprofit organizers making custom swag, even soccer teams making patches for their jerseys—all using our service, and they love the quality way more than if they tried to DIY for a big order.
A lot of people ask, “Is designing my own sublimation patch worth it?” If you’re doing 1 or 2 patches for personal use, absolutely—you can get exactly what you want, no waiting for shipping, and it’s fun. If you’re doing more than that, or if you want professional-grade patches that last for years, it’s totally worth reaching out to a supplier that knows the sublimation patch game. We test every batch to make sure the colors are vibrant, the bonding is permanent, and there’s no weird peeling after 10 washes.
Speaking of worth—let’s talk costs. DIY might seem cheaper at first, but you have to factor in the printer, ink, heat press, transfer paper, and the time you spend messing up the first 5 patches. For small runs, a supplier is often the same price or even cheaper, and you get consistent quality. For large runs (like 100+ patches), suppliers have bulk pricing that beats buying all the equipment yourself.
Now, let’s wrap this up—yes, you can design your own sublimation patches. It’s not rocket science, but it does need a little attention to detail, using the right materials, and following the process step by step. If you’re a hobbyist wanting one custom patch for your backpack, go for it—grab a cheap Epson EcoTank, sublimation ink, a small heat press, and follow the specs we talked about. If you’re a small business or organization needing multiple patches, don’t waste your time on a huge DIY setup—hit up a reliable sublimation patch supplier to get exactly what you need, without the hassle.
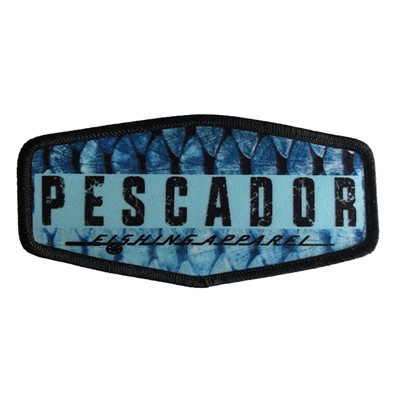
At the end of the day, sublimation patches are all about making something that’s personal, vibrant, and built to last. Whether you DIY or use a supplier, the key is to do it right so you’re not left with a patch that looks like it’s seen better days after one wash. If you’re ready to bring your custom patch idea to life, feel free to reach out to us to chat through your design, specs, or order size—we’re here to help make your vision happen, no stress, no weird jargon, just good quality patches that you’ll be proud to show off.
Sublimation Patches References:
- Sublimation Basics: Color Mode, Resolution, and Material Compatibility. 2022. Printful.
- Sublimation Patch Care and Longevity. 2021. Heat Press Nation.
- DIY Sublimation Patch Setup for Beginners. 2023. Cricut Design Space Blog.
Kaishen Garment Accessory Co., Ltd.
As one of the most professional sublimation patches manufacturers and suppliers in China, we’re featured by quality products and low price. Please rest assured to wholesale bulk cheap sublimation patches from our factory. Contact us for customized service and free sample.
Address: No.1, Yangguang Road, Shanwu Village, Shijie Town, Dongguan City, Guangdong Province
E-mail: patch@shiujan.com
WebSite: https://www.kspatch.com/
